The Fundamentals of Baking Bread
- Sep 1, 2025
- 9 min read
Updated: Sep 15, 2025
Art & History
Bread has always been more than food—it’s a symbol of nourishment, community, and tradition. For thousands of years, cultures around the world have turned the simple elements of flour, water, and heat into something extraordinary. The earliest loaves, baked over hot stones or in clay ovens, were humble beginnings of what would become an essential part of daily life.
As civilizations grew, so did the craft of breadmaking. From the airy sourdoughs of ancient Egypt to the golden baguettes of France, from rustic Balkan loaves to sweet holiday breads, each culture has left its mark on the story of bread. Techniques were passed down through generations, weaving family traditions, rituals, and celebrations into every bake.
Today, baking bread is both an art and a science. It teaches patience, creativity, and respect for time-honored methods, while also inviting experimentation with new flavors and modern twists. Whether kneading by hand or letting dough rise overnight, baking bread connects us to a tradition as old as humanity itself—reminding us that a simple loaf can carry history, heritage, and heart in every slice.
If you’re a beginner interested in simple bread baking, you’ve come to the right place. In this post, I’ll share some straightforward baking knowledge and easy bread recipes that you can try at home, along with practical tips and tricks.

Activating Yeast & Proofing Dough
Activating the Yeast
Activating yeast is the process of rehydrating dried yeast cells. As many of you know, yeast is a living organism, and when properly awakened, it’s what gives bread its rise and airy texture.
To activate the yeast, it’s usually mixed with warm water (about 100–110°F / 37–43°C) and a touch of sugar. The warmth wakes the yeast, while the sugar provides quick food. Within 5–10 minutes, the mixture should become foamy and bubbly—signs that the yeast is alive and ready to work. If no bubbles form, the yeast may be expired, and it’s best to start again.
Activating the yeast is crucial for several reasons. One of the key reasons is that by dissolving the yeast beforehand, you avoid having dry, gritty pieces of yeast in your final baked products.
Proofing the Dough
Proofing (or rising) is the stage where yeast does its magic, releasing carbon dioxide and allowing the dough to expand. Proper proofing allows time for the yeast to work its magic, leavening the bread, developing flavor, texture, and structure.
Depending on the recipe, proofing can take anywhere from 45 minutes to several hours. Most recipes will require a first proofing (bulk fermentation) and sometimes even a second proofing before baking. For proper proofing place the dough in a lightly greased bowl, cover it, and let it rest in a warm, draft-free spot.
To test if your dough is ready, gently press a finger into it. If the indentation slowly springs back, the dough is proofed and ready for the next step. If it bounces back too quickly, it needs more time. If it doesn’t spring back at all, it may be over-proofed—still usable, but with a denser result.
Understanding Simple Bread Baking Techniques
Kneading is essential for developing gluten which gives bread its structure. Kneading dough techniques involve pressing, folding, and stretching the dough repeatedly to develop gluten strands. Gluten is a network of proteins that trap gas produced by yeast, allowing the dough to rise and hold its shape. A general rule of thumb is to knead your dough for about 8-10 minutes. Proper kneading results in dough that is smooth, elastic, and slightly tacky but not sticky.
There are several kneading methods you can use depending on the type of dough and your preference. Understanding these will make your baking journey much smoother.
1. Stretch and Fold (a.k.a. Slap and Fold)
Best for: Wet doughs (like ciabatta, sourdough)
How it works:
Grab one side of the dough, stretch it upward, then fold it back onto itself.
Rotate the dough 90°, repeat the process.
Great for building gluten without aggressive kneading.
2. Push and Turn
Best for: Everyday yeasted doughs (like sandwich loaves, pizza)
How it works:
Push the dough away with the heel of your hand.
Fold it back toward you, turn 90°, and repeat.
This is the traditional hand-kneading method most people learn first.
3. French Fold (Slap and Fold – more aggressive)
Best for: High hydration doughs
How it works:
Pick up the dough, slap it down onto the counter, then fold it over itself.
Fast and rhythmic, perfect for strengthening sticky doughs without adding extra flour.
4. Rubaud Method
Best for: Sourdough, artisanal loaves
How it works:
Lift a portion of the dough from the edge, stretch it upward, and slap it down in the center in a scooping motion—like a wave or splash.
Gentle yet effective at developing gluten.
5. No-Knead (Autolyse + Stretch & Fold)
Best for: Long fermentation breads, artisan loaves
How it works:
Let the dough rest after mixing (autolyse).
Do a few stretch-and-folds during bulk fermentation.
Relies on time and fermentation instead of mechanical kneading.
✨ Tips for Successful Kneading
Dough should become smooth, elastic, and slightly tacky.
Windowpane test: stretch a small piece—if it forms a thin membrane without tearing, it's ready.
Don’t over-flour! A bit of stickiness is normal.
Kneading too much can make dough overly tight and tough (rare, but possible with machines).
What are the Four Steps to Kneading Dough?
To master kneading dough, it helps to break the process into four clear steps:
Mixing Ingredients
Combine the yeast concoction with the flour, salt, and any other ingredients until they form a shaggy dough. This initial mix ensures all components are evenly distributed.
Pressing and Folding
Use the heel of your hand to press the dough away from you, then fold it back over itself. Rotate the dough 90 degrees and repeat. This motion aligns gluten strands and builds strength.
Stretching and Folding
Gently stretch the dough outward and fold it back. This step helps develop elasticity without tearing the dough.
Testing for Readiness
Perform the windowpane test by stretching a small piece of dough thinly. If it stretches without tearing and light passes through, the dough is well-kneaded.
These steps can be adjusted based on dough hydration and recipe requirements. For example, wetter doughs may require more gentle folding, while stiffer doughs benefit from firm pressing.
Troubleshooting Common Kneading Issues
Even experienced bakers can face challenges when kneading dough. Here are some common problems and their solutions:
Not Resting the Dough: Rest periods allow gluten to relax, making shaping easier.
Dough is Too Dry: If your dough turns out too dry and crumbly, it likely lacks enough moisture. Next time, add a little more water or liquid ingredients slowly until you achieve the right texture.
Dough is Not Rising: If your dough fails to rise, this could be due to inactive yeast. Always make sure your yeast is fresh. Keep it stored in a cool, dry place and check the expiration date.
Over-Kneaded Dough: While it’s important to develop the gluten structure, over-kneading can make the bread tough. If your dough tears easily and has a shiny appearance, you might have overdone it.
Under-Kneading: Results in a dough that is too loose and won’t rise well.
Ignoring Dough Temperature: Cold dough is harder to knead; warm dough is easier but can ferment too quickly.
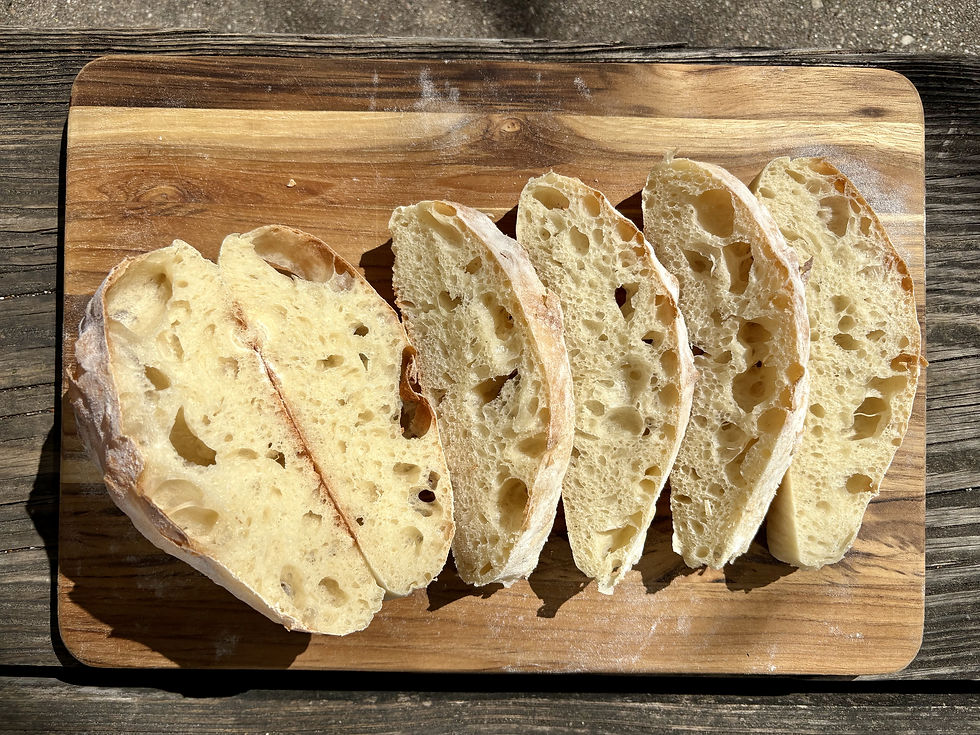
Over-proofing is a crucial aspect of the bread-making process that can significantly affect the final product. For instance, the appearance of the loaf may be slightly inflamed, characterized by an over-risen look that suggests the dough has expanded beyond its optimal point. This can lead to a baked good that is not only misshapen but also lacking in structural integrity. Furthermore, an over-proofed dough will often have a very pronounced yeasty smell and taste, which can overwhelm the more subtle flavors that are desirable in a well-crafted bread. This strong yeast flavor can mask the nuances of other ingredients, such as the sweetness of the flour or the richness of added fats. Additionally, the coloration of the crust may be slightly different as well; it can appear paler or unevenly browned due to the compromised structure of the dough.
By recognizing these common issues and addressing them, you can elevate your bread-making game.
Advanced Kneading Techniques
For those looking to refine their skill, consider exploring these advanced techniques:
Autolyse Method: In this technique, mix the flour and water only, allowing it to rest for 20-30 minutes. This gives time for the flour to absorb water and enzymes to begin breaking down starches. Then add the yeast and salt later and knead as usual.
Cinematic Approach: While not widely practiced, some bakers enjoy kneading dough under a bowl instead of on a surface. The bowl’s shape creates an environment where the dough can stretch without excessive handling.
Using a Mixer: If you're short on time or have physical limitations, using a stand mixer fitted with a dough hook can make kneading much easier. Just ensure you’re monitoring the dough's development.
Ingredients Matter
The foundational ingredients for most bread recipes include flour, water, yeast, and salt. Always use high-quality ingredients for the best results. For example, using bread flour instead of all-purpose flour can significantly impact your bread's texture and rise due to the % of protein. The flavor of bread flour vs. all-purpose flour actually differs more than most people expect—and it can have a real impact on your final loaf.
🌾 Key Differences in Flavor Between Bread Flour & All-Purpose Flour
1. Protein Content (aka Gluten Potential)
Bread flour has higher protein (typically 12–14%)
All-purpose flour has lower protein (about 9–11%)
Why it matters for flavor:
Higher protein means more gluten development during kneading and fermentation.
This results in better structure, which also helps trap fermentation gases and flavorful byproducts from yeast and bacteria.
So, while the flour itself might not taste radically different raw, bread flour allows deeper, more developed flavors to come through in the finished bread—especially in long-fermented doughs like sourdough.
2. Texture Affects Flavor Perception
Bread flour yields chewier, springier bread with a structured crumb.
All-purpose flour gives a softer, sometimes denser texture.
The chewier bite of bread flour can actually make flavors linger longer on the palate, especially if there’s caramelization in the crust.
3. Fermentation & Maillard Reaction
Bread flour ferments more robustly due to its gluten strength, which supports longer proofing times.
More fermentation = more lactic/acetic acids, alcohols, and esters = deeper, more complex flavors (slightly tangy, nutty, savory).
A well-fermented bread flour loaf has a more aromatic crust and deeper flavor due to the enhanced Maillard reaction during baking.
🧠 Quick Summary:
Feature | Bread Flour | All-Purpose Flour |
Protein Content | Higher (12–14%) | Lower (9–11%) |
Gluten Development | Stronger, chewier structure | Softer, less elastic |
Flavor Profile | Deeper, more fermented & complex | Milder, simpler, soft-flour taste |
Best For | Rustic breads, sourdough, baguettes | Cakes, muffins, soft rolls, cookies |
Final Thought about flour:
Bread flour doesn’t necessarily “taste better” on its own—but it enables flavor to develop more fully, especially in traditional or long-fermented loaves. It’s like a better canvas for bread flavor to shine.
Simple Recipes for Beginners
If you're searching for simple yet traditional bread recipes, you've found the perfect spot. Here are some of my own recipes you should consider trying:

Baking Tips for Success
When you venture into baking, a few tips can help make your experience smoother:
Read the recipe thoroughly: Understanding each step before you start will minimize mistakes.
Measure accurately: Using the right amount of each ingredient is crucial. Use a kitchen scale for precision.
Room Temperature Ingredients: Ingredients like butter and eggs incorporate more easily when they are at room temperature.
Don’t skip the preheating step: A properly preheated oven ensures that your baked goods will rise and cook evenly.
Experiment with flavors: Once you become comfortable with basic recipes, feel free to experiment by adding herbs, cheeses, seeds, or nuts. This will not only enhance the taste but also make your home-baked bread unique.
Stickiness: To prevent dough from sticking to your fingers, apply a water or oil wash on your fingers before handling the dough.
Use a thermometer: To achieve the best results, monitor the temperature of your dough and your environment. Ideal room temperature for yeast fermentation is typically between 75°F and 85°F. Use a digital thermometer for precise readings. I don't use a thermometer myself, but I make sure the dough is at the ideal temperature based on whether I want to accelerate or slow down the proofing process.
Invest in Baking Tools:
Kitchen scale - using a kitchen scale to measure your ingredients can lead to more consistent results. Measuring flour by weight rather than volume will give you a precise amount, which is especially important in bread baking.
Mixing Bowls - best material: stainless steel chem-free, polished wood chem-free.
Bowl Scraper or Spatula
Dough Whisk
Towels for cleaning and proofing - best material: cotton, linen, satin.
Measuring glassware
Measuring spoons
Rolling pin
Silicone Bakint Matts & Parchment Paper (Optional)
Discovering the Joy of Bread Baking - Keep Learning
Bread-making is a craft perfected over time. Don’t be discouraged by early failures. Keep practicing, and you will find your technique improving with each attempt.
No matter which kneading technique you choose to employ, the key to beautiful homemade bread lies in practice and patience. In time, you will understand how a perfect dough feels and smells. The satisfaction of pulling a steaming loaf from the oven will make every minute spent kneading worth it.
When you feel confident in your kneading skills, feel free to experiment with different bread recipes to challenge yourself further. Whether it’s focaccia, baguettes, or sourdough, the principles remain similar.
Mastering the art of kneading dough is about more than just technique; it’s about connecting with the ingredients and loving the process.
Remember, every loaf of bread is a new opportunity to learn and grow as a baker. So roll up your sleeves, and let the magic begin!
For more easy bread recipes and baking tips, check out my collection of beloved recipes. Happy baking!